.jpg)
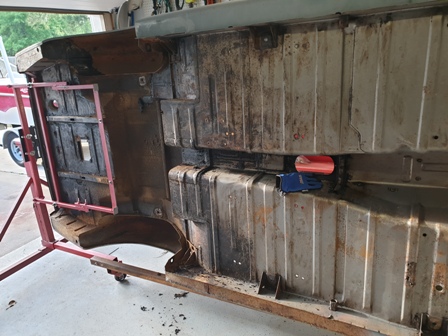
Stripping the Underside (11 Apr 2020)
I finally flipped the body and started stripping the old undercoating.
Heat (11 Apr 2020)
The original undercoating is pretty thick and released by melting it back to a soft rubber and scraping.
.jpg)
.jpg)
Blast If You Can (12 Apr 2020)
If you can have the body media blasted that would be the way to go. This process of melting and scraping was long and messy.
Working Small Sections (12 Apr 2020)
Working small sections so it feels like I'm getting somewhere.
.jpg)
.jpg)
Residue (12 Apr 2020)
After you melt the ruberized undercaoting it seems to leave a black film. I moved on to a metal cleaner to remove that residue.
Getting There (12 Apr 2020)
After the Marine Clean wipe most of the film was removed and I have pretty clean steel.
.jpg)
.jpg)
Cleaning Fenders (18 Apr 2020)
The fenders have some of the thickest undercoating and one of the largest seams where the inner and outer fenders meet.
Fenders cleaned (18 Apr 2020)
The fenders on my car are in great shape, there is no rot or rust. I had rolled the lip on the front fender and decided I would do the same on the rear. Probably not an issue, but this is the time to complete this prior to any paint.
.jpg)
.jpg)
POR 15 (18 Apr 2020)
Since the lip will be rolled and rust seems to form on this area of the fenders I POR 15'd the channel and dusted with primer.
Opposite End (18 Apr 2020)
I brushed the entire lip the same way. Both ends hold debris so they got a wide seal area of POR.
.jpg)
.jpg)
Rolled and Epoxy (19 Apr 2020)
Rolled the lip almost flat and epoxy primed the channel.
Ready for Next Step (19 Apr 2020)
.jpg)
.jpg)
Sand and Tape (25 Apr 2020)
I have had most of the body in Epoxy Primer for some time. To make sure I have a good mechanical and chemical bond I sanded the epoxy down again so as I sprayed the underside the new epoxy could link with any previously primed areas.
Final Wipe Down (25 Apr 2020)
I did one last wipe down with a pre painting prep.
.jpg)
.jpg)
2 Wet Coats of Epoxy (25 Apr 2020)
I sprayed 2 medium wet coats of epoxy primer making sure I got into every nook and cranny.
Seam Seal (25 Apr 2020)
I used a seam sealer on almost all major overlap areas. I filled in the large gap at the fenders that I had stripped out.
.jpg)
.jpg)
Undercoating On! (26 Apr 2020)
I finally got the bottom covered and I'm happy with the way it turned out . I used UPOL Gravitex and it really sprayed well.
Trans Tunnel (26 Apr 2020)
You can see the undercoating really covered everything well. I had put plugs in all threaded holes to avoid any undercoating fouling the threads.
.jpg)
.jpg)
Closeup of Texture (26 Apr 2020)
Close up of textured pattern.
Dried (26 Apr 2020)
Undercoating dried.
.jpg)
.jpg)
Completed (26 Apr 2020)
Everything dried nice and the coating looks great. The UPOL product is paintable and I'm going to cover it just for a little extra protection and to allow a transition from undercoat to paint where the two may meet.
Paint (27 Apr 2020)
The UPOL product is paintable and I had a quart of single stage black in the cabinet so I painted the underside for another layer of protection, but also to allow there to be paint under the front fenders.
.jpg)
.jpg)
Lowered Body Dolly (27 Apr 2020)
I had the body on a homemade dolly prior to putting on the rotisserie. Now that the underside is complete I lowered it 4 inches so I could work on the whole body prior to painting.
On the Dolley (27 Apr 2020)
With the body on the dolly I was able to remove the door braces and work toward finishing. Here you can see how the single stage covered the areas that are under the fender, but not undercoated.